After many gentle reminders, here is a recipe I’ve been promising to friends for ages! Everyone who tries these crackers loves them, whether they’re accompanied by my homemade hummus or some creamy Castello cheese (a dairy product our mostly dairy-free family just can’t resist!). Almost as important as the flavour and texture are the ingredients – these crackers contain only seeds, salt, psyllium husk, and water. No flour!
I would love to put my name forward as the inventor of this recipe, but it was actually shared with me by a friend, who got it from a friend… so I’m not actually sure who the genius behind it is. I’ve modified it slightly to include the extra step of activating the seeds first, and adjusting the quantities of psyllium husk and water accordingly.
If you’re not already a seed-soaker, you might ask why anyone would go to the extra trouble of soaking and activating the seeds? Basically, seeds contain anti-nutrients, which is an issue if you are eating a lot of them. Anti-nutrients mean that while seeds (and nuts etc) are packed with vitamins and minerals, they are not readily absorbed by our digestive system and they can cause digestive discomfort and distress when eaten in large quantities. Pre-soaking seeds (and nuts etc) breaks down some of these anti-nutrients so the seeds can actually deliver what they promise in the way of minerals like zinc, potassium, and magnesium, as well as reduce symptoms like bloating and gas.
So now I will talk you through the recipe, but you can skip down to the bottom of this post if you just want to read the recipe card!
First up, to soak your seeds you just want to put them all in a large mixing bowl and add 1Tbsp salt (remember not to use refined salt. I use NZ sea salt for all my cooking and fermenting). Fill bowl with filtered water so the seeds are covered by about 3cms water. I cover the bowl with a plate and leave it on the counter overnight (about 8 hours).
In the morning, I strain the seeds in a sieve and rinse them with fresh water. If I’m ready to bake, I preheat the oven to 160°C (no fan, just oven bake). The strained seeds can go back into the mixing bowl, and you can add ½tsp salt, 1½Tbsp psyllium husk, and a cup of water (250mLs). Stir everything together really well, and then leave for about 10 minutes to set into a sort of sloppy jelly.
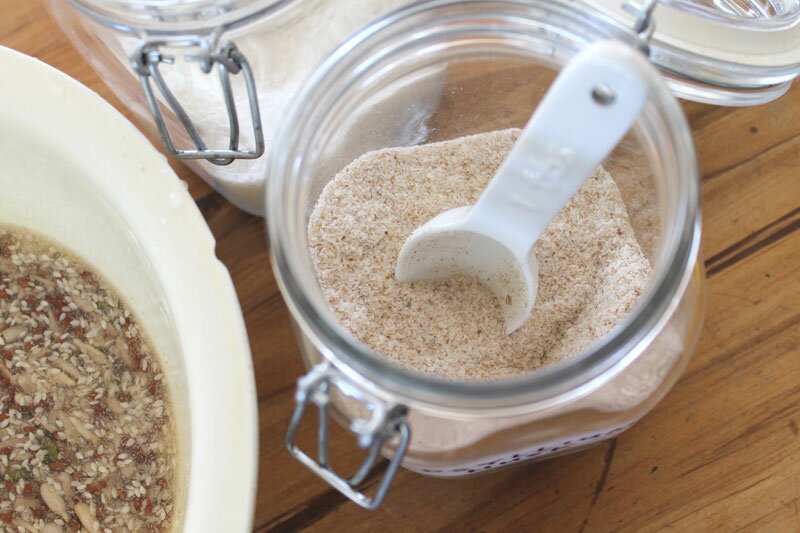
If it’s not jelly-ish enough, you can now add a bit more psyllium husk. I only ever add up to another ½Tbsp, so I have a total of up to 2Tbsp psyllium husk in the mix.
Now I prepare a large flat baking tray by putting a silicone baking mat down. The silicone mat is the only thing I’ve found that allows the cracker to bake crispy without sticking – because it is very sticky when baking! I tried baking paper once, and everything ended up soggy and wet 🙁 . My non-stick Scanpan worked once and after that the crackers always fused to the bottom 🙁 . So silicone it is for now.
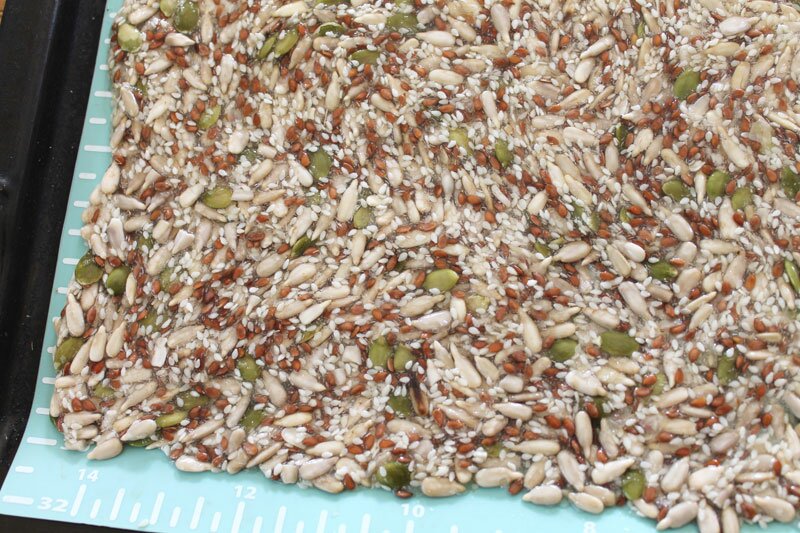
Spread the cracker mix as thinly as you like over the silicone mat, making sure there are no gaps, and bake for approx 1 hour. I find that after an hour the edges are browned up nicely but the middle is still a bit sticky, so I break off the edges into little crackers and then flip the remaining cracker mix over. The silicone mat is very hot so I use oven mitts to flip it over and then gently peeeel it away from the cracker, before returning the cracker (sans silicone mat) back to the oven on a lower heat just to finish it off. What kind of ‘lower heat’, you ask? Hmm, maybe like 120°C-ish. Then I just keep it going, checking regularly to make sure it isn’t burning, until it’s crispy and golden brown.
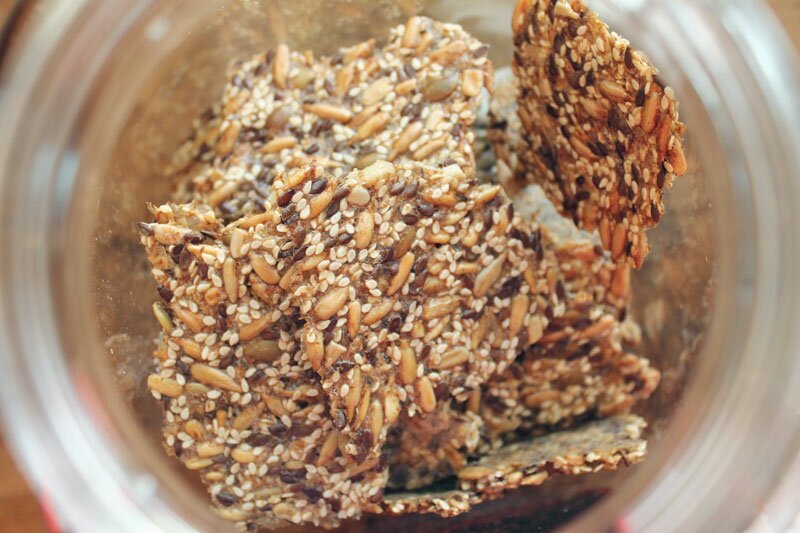
When the cracker is done, remove it from the oven and let it cool before breaking it into smaller cracker-sized pieces and placing them in an airtight container (you know how I feel about plastic, so my crackers go into a glass Fido jar!). Mine don’t last very long because my husband keeps sneaking them when I’m not looking. But if you ever get a chance to eat yours, they are absolutely yummy smeared with some soft cheese, or hummus, or even just plain. They are brilliant for take-away kids’ snacks when you’re desperately trying to get out of the house in a hurry and would normally reach for some plastic-wrapped commercially-prepared snack food, but you are now striving to live plastic-free/zero-waste…! 😉

Seedy Crackers Recipe
Ingredients
- 100 g sunflower seeds
- 30 g flaxseeds
- 50 g sesame seeds
- 25 g pumpkin seeds
- 1 Tbsp salt
- 1½ - 2 Tbsp psyllium husk
- 250 ml water (= 1 cup)
- ½ tsp salt
Instructions
-
Put all of the seeds into a large mixing bowl. Add 1Tbsp salt (I use unrefined sea salt) and enough filtered water to cover the seeds so they are about 3cm below the water level. Leave them to soak overnight (8 hours or so). In the morning, drain the seeds in a sieve and rinse them under running water.
-
Preheat the oven to 160°C (oven bake, no fan).
-
Tip the strained seeds back into the mixing bowl. Add ½tsp salt, 1½ Tbsp psyllium husk and 250mL (1 cup) water, and stir it all together thoroughly. Leave it for ~10mins to let it set into a sloppy jelly. If it is too runny, add some more psyllium husk - I would suggest up to ½Tbsp (so you have total 2Tbsp psyllium husk in your cracker mix).
-
Spread the cracker mix on a silicone baking mat on a large flat baking tray. Bake for 1 hour. After about an hour, take the tray out of the oven and flip the silicone mat over (it will be extremely hot so use oven mitts!), then carefully peel the silicone off the cracker. Sometimes I find that the edges are browned and crispy already so I break them off now and continue baking the rest. Return the upside down cracker to the oven on a reduced heat just to crisp it up and brown it. Keep an eye on it now because you don't want it to burn.
-
When it's all nicely browned and crispy, remove from the oven and let it cool. Break into smaller pieces and store in an airtight container.
And for your interest, here are a couple of articles on seed-soaking:
Food Matters: “The benefits of soaking nuts and seeds”
Wellness Mama: “The importance of soaking nuts and seeds”
looks good