When I was a kid, I don’t recall ever using sunscreen (although perhaps that’s just my flawed memory). What I do remember is lying out on the lawn as a young teenager with a bottle of Johnson&Johnson’s baby oil (shudder…) slathering it over my skin in the hope of getting a quick bronze tan. I can’t recall why it was so important, but it was. During my high school years, sunscreen and sun protection began to be aggressively promoted by the Ministry of Health, the Cancer Society, and sunscreen manufacturers, and the slogan “Slip, Slop, Slap” was drummed into mainstream consciousness, mine included. These days, sunscreen and hats are as culturally mandatory as seatbelts and car seats. My children walk to kindy every morning with their bright green kindy hats on and a tube of homemade sunscreen in their bags. I would feel positively irresponsible sending them out for the day in summer without hats and sunscreen going along for the ride.
Melanoma is certainly nothing to be blasé about, especially for us kiwis. It is aggressive and unforgiving. For this reason, I’m nervous writing a post about homemade sunscreen because I’m sure some readers will feel very strongly about perceived risks associated with doing-it-yourself. But there is also much interest in homemade sunscreen and I personally feel very comfortable about making it and using it on my whole family (little ones included). So I’ve decided I’ll put my ideas out there anyway, and let you readers make your own minds up about what you think is best for you 
For the past two summers, I’ve been making sunscreen for my family to use, and this year is no exception. I used to be a devoted fan of Nivea sunscreen because it absorbed easily into my skin without any greasy residue and didn’t leave me with a whitish glow. More importantly, I didn’t burn when I used it, even sparingly. I tried a few ‘safer’ mineral sunscreens but they were always just a little bit inferior in some way to my favourite Nivea Spray-on SPF15. Either they were a wee bit greasy, thick and sticky, or the white cast made me feel like Bobo the clown. The ultimate deal-breaker was inevitably the exorbitant cost. I simply couldn’t (wouldn’t) afford them, so I always went back to my affordable old faithful.
But then came December 2011, and I was struggling to think of a New Year’s resolution. It was tough because I was feeling pretty contented heading into 2012: I wasn’t depressed and I’d found my soulmate (finally!). I wanted a resolution that was manageable but slightly challenging, meaningful, and measurable. So I resolved to make our bathroom cruelty-free by the end of 2012, no excuses. One by one, as we used up bottles of shampoo, conditioner, toothpaste, face cream, I replaced them with cruelty-free alternatives. But what about sunscreen? Whew, Nivea assured me it doesn’t test their products on animals – sunscreen was the one product I didn’t have to change. However, as we spent the year getting comfortable with our new animal-friendly product choices, we started to notice that the sunscreen had become a bit of an odd-one-out. An unintended effect of switching to cruelty-free products was that we were now choosing to use products which had: fewer ingredients and/or fewer scary chemical ingredients and/or organic ingredients and/or less plastic packaging. Nivea sunscreen ticked none of those boxes 
So I decided to just bite the bullet and make the switch to a mineral sunscreen, Bobo the clown or not. Fortunately, I found Oasis Sun sunscreen, which to this day, I like best of all the sunscreens I’ve ever bought (Update 8/11/19 – I stopped using Oasis sunscreen when I noticed it contains ethylhexyl methoxycinnamate 

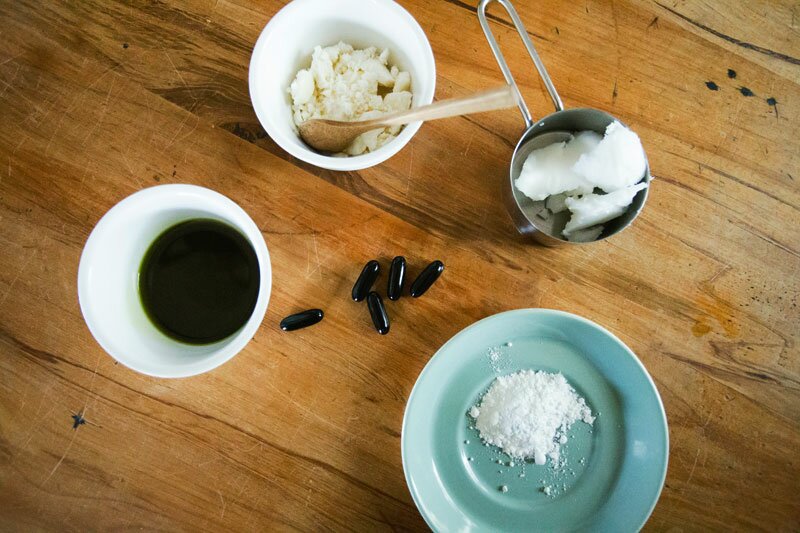
The sunscreen I now make every spring comes from an American blog, ScratchMommy.com. This blogger sells her recipe as a ready-made product called “Sunshade” but she has also generously decided to share it with the rest of us via her blog. It contains just 6 ingredients: beeswax (sorry, I forgot the beeswax for this photo, d’oh!), shea butter, coconut oil, a liquid carrier oil (my choice: hempseed oil), vitamin E, and zinc oxide. All ingredients except the vitamin E capsules I already have in my bathroom/kitchen as I use them also to make baby bum balm and skin cream. The shea butter, coconut oil, and hempseed oil are organic, raw, and unrefined. I use locally sourced Sweetree beeswax – this comes as a pastille so I grate it for ease of use. All ingredients are safe to ingest (although zinc oxide powder is very bad for your lungs so you have to be oh-so-careful NOT to inhale it!). I get the non-nano zinc powder and the vitamin E capsules from the Herbal Dispensary here in Hamilton. They sell the capsules individually too, which makes it affordable. It takes me about 20 minutes to make a batch, which results in approximately 1 cup of sunscreen. Last year it was more than my family needed for the summer.
Homemade Sunscreen
Ingredients
- 28 g grated beeswax
- 28 g shea butter
- 90 g coconut oil
- 65 g hempseed oil (or any other liquid carrier oil, like avocado oil or apricot oil)
- 40 g non-nano zinc oxide powder
- ½ tsp vitamin E (or I use 4 - 5 capsules)
Instructions
-
Choose a glass jar or bowl to make your sunscreen in. This recipe makes about 1 cup of sunscreen, so I use a 500mL Agee jar. Add beeswax, shea butter, and coconut oil to the jar.
-
Sit the jar in a pot of warm water on the stove and turn heat to low. As the water heats up the ingredients will melt. Stir frequently and heat only enough to melt the beeswax fully.
-
Take the jar out of the water, wiping the sides dry and taking care to ensure no water gets into the mixture. Stir in the 65g hempseed oil (or other liquid carrier oil).
-
Cut the capsules open with a sharp knife and squeeze the vitamin E oil into your mixture.
-
Measure out 40g zinc oxide powder, then carefully add it a teaspoon at a time to your mixture, stirring as you go. When it has been stirred through, whisk it thoroughly to make sure there are no clumps or lumps, and then pour into container/s of your choice. Leave it to set.
Recipe Notes
Take special care with the zinc oxide powder, as you do NOT want to inhale it! Cover your mouth if necessary, and it would be sensible to remove all distractions (such as little kids) from your workspace before starting. Amounts are provided in grams for greatest accuracy. Apply this sunscreen generously and reapply frequently, particularly when you are in and around water as it is not waterproof. It doesn't promise any SPF factor as it has not been laboratory tested, so please exercise common sense - test on your own skin to see how it will work best for you.

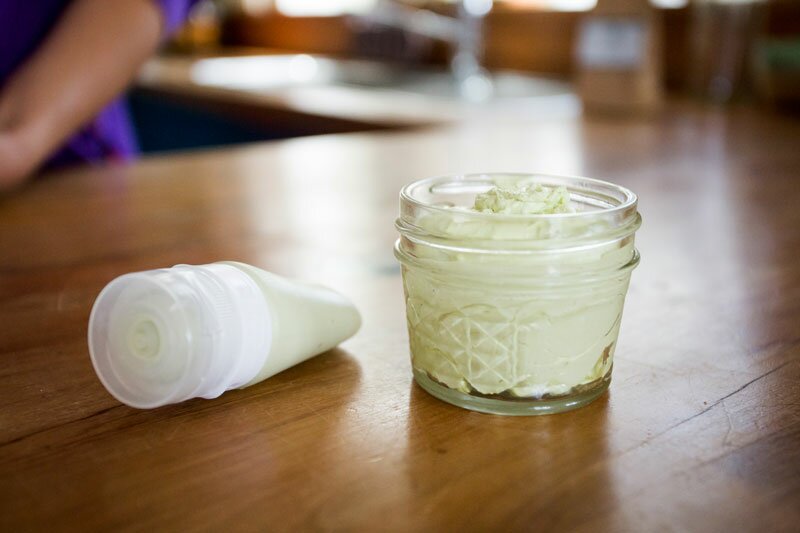
My absolute favourite way to store our homemade sunscreen is in these refillable silicone squeeze-tubes by Gotoob (I sell them in my shop, here.) Why are they awesome? They keep your sunscreen clean between uses. They are easy to fill and to empty completely. They are refillable so you can use them year after year. The small tubes are perfect for my children’s kindy bags and my handbag, meaning I can always have a little tube on-hand, even when I’m disorganised!
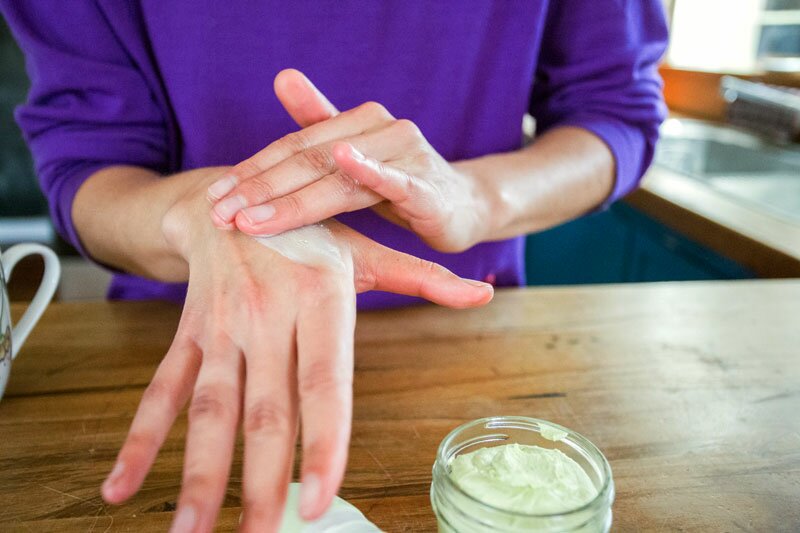
Any leftover sunscreen I store in the fridge until I need it for refills. All these natural ingredients keep better in cool, dark environments, particularly the hempseed oil. You can see that the sunscreen has a white tinge to it because of the zinc oxide, but that disappears after a wee while. The good thing is that you can see where you’ve applied it, and it’s a way to ensure you’re using enough. Because it’s the zinc oxide that protects your skin by creating a physical barrier on the surface, you don’t want to skimp on it – that will defeat the whole purpose!

And now, what about the risks? Some people feel very strongly about the risks associated with a DIY sunscreen. In order to guarantee a certain level of SPF, you would need to go through a whole lot of rigorous laboratory testing, and there is no doubt that mixing up your own cream will result in a product that will vary in SPF from batch to batch. If sunscreen is your only defence against sunburn and skin damage, then this would be a very risky way to go about protecting yourself.
However, the reason why I’m comfortable with making my own is that I don’t see it as a foolproof way to protect my skin from sunburn. I have never burned while using it and neither have my husband or kids – but that’s probably also because we exercise caution in the summer sun in other ways. Much as I would love to be outside gardening in the heat of the day, I don’t. I save that for morning or evening times when I can feel the sun’s rays are gentler. My children are still little so they sleep in the middle of the day. When we are out and about, we wear hats and often cover our arms with loose, long-sleeved tops. I also make a point of getting outside during the spring months, just to get a bit of colour into my skin and prepare it for summer. I believe that short, daily doses of sun exposure help me to avoid sunburn when summer hits. And finally, I really believe that my diet plays a key role in maintaining good skin health in all seasons.
Looking back, I believe that my Nivea sunscreen was so effective it didn’t require me to compromise my lifestyle in summer at all – I used to think that as long as I covered my skin with it I could lie out in the sand or poolside for hours at a time. Of course, if I missed a patch – well, I certainly paid the price afterwards. A sunburn like no other, given that I’d just roasted that little patch of unprotected skin like I wouldn’t roast a chicken unless I wanted charcoal for dinner. I think that’s a downside of chemical sunscreens that people don’t often consider. And then of course, there are the chemicals in chemical sunscreens. The health risks associated with commonly used sunscreen ingredients such as oxybenzone, butyl methoxydibenzoylmethane, octyl methoxycinnamate, parabens, preservatives such as methylchloroisothiazolinone, perfumes and fragrances, have been publicised for years now. Already in 2008, oxybenzone was detected in more than 96% of the American population, and a number of common sunscreen chemicals have been found in samples of blood, urine, and breast milk¹. Some of these chemicals are suspected hormone-disruptors and possible carcinogens, so when I weigh up the risks of homemade sunscreen I am comparing them to these known risks of chemical sunscreens. Given that we are still not 100% sure that sunscreen actually does protect us from melanoma², I’ve decided that for now I’ll choose to use my homemade 6 ingredient sunscreen as just one of a number of strategies for exercising common sun-sense this summer.
¹,² Environmental Working Group: “The Trouble With Oxybenzone And Other Sunscreen Chemicals” (2016)
If you are interested in reading more on the topic of sunscreen, here are some articles I found helpful in writing this post:
The original homemade sunscreen recipe with notes and FAQ: http://www.scratchmommy.com/diy-sunscreen-easy-make-need-recipe/
Published in 2008, this is an oldie but a goodie, as it outlines all the main concerns people have with certain common ingredients in chemical sunscreens: http://www.good.net.nz/article/2008/12/slip-slop-slap-safe
Dr Mercola’s take on sunscreens and skin cancer: http://articles.mercola.com/sites/articles/archive/2016/06/08/the-truth-about-sunscreen-protection.aspx
An interesting post that cautions against homemade sunscreen: https://realizebeauty.wordpress.com/2012/12/30/the-trouble-with-making-your-own-sunscreen/

Nice article! You are sharing such a great recipe. I will definitely try this homemade screen. Thanks for sharing.